“New Job” button located on the top right of the “Jobs” section should be clicked on to create a new job.

Hire / Promote Process
Job details, stage selection, stage rules and content selection areas should be completed to create a progressive job.
Step 1
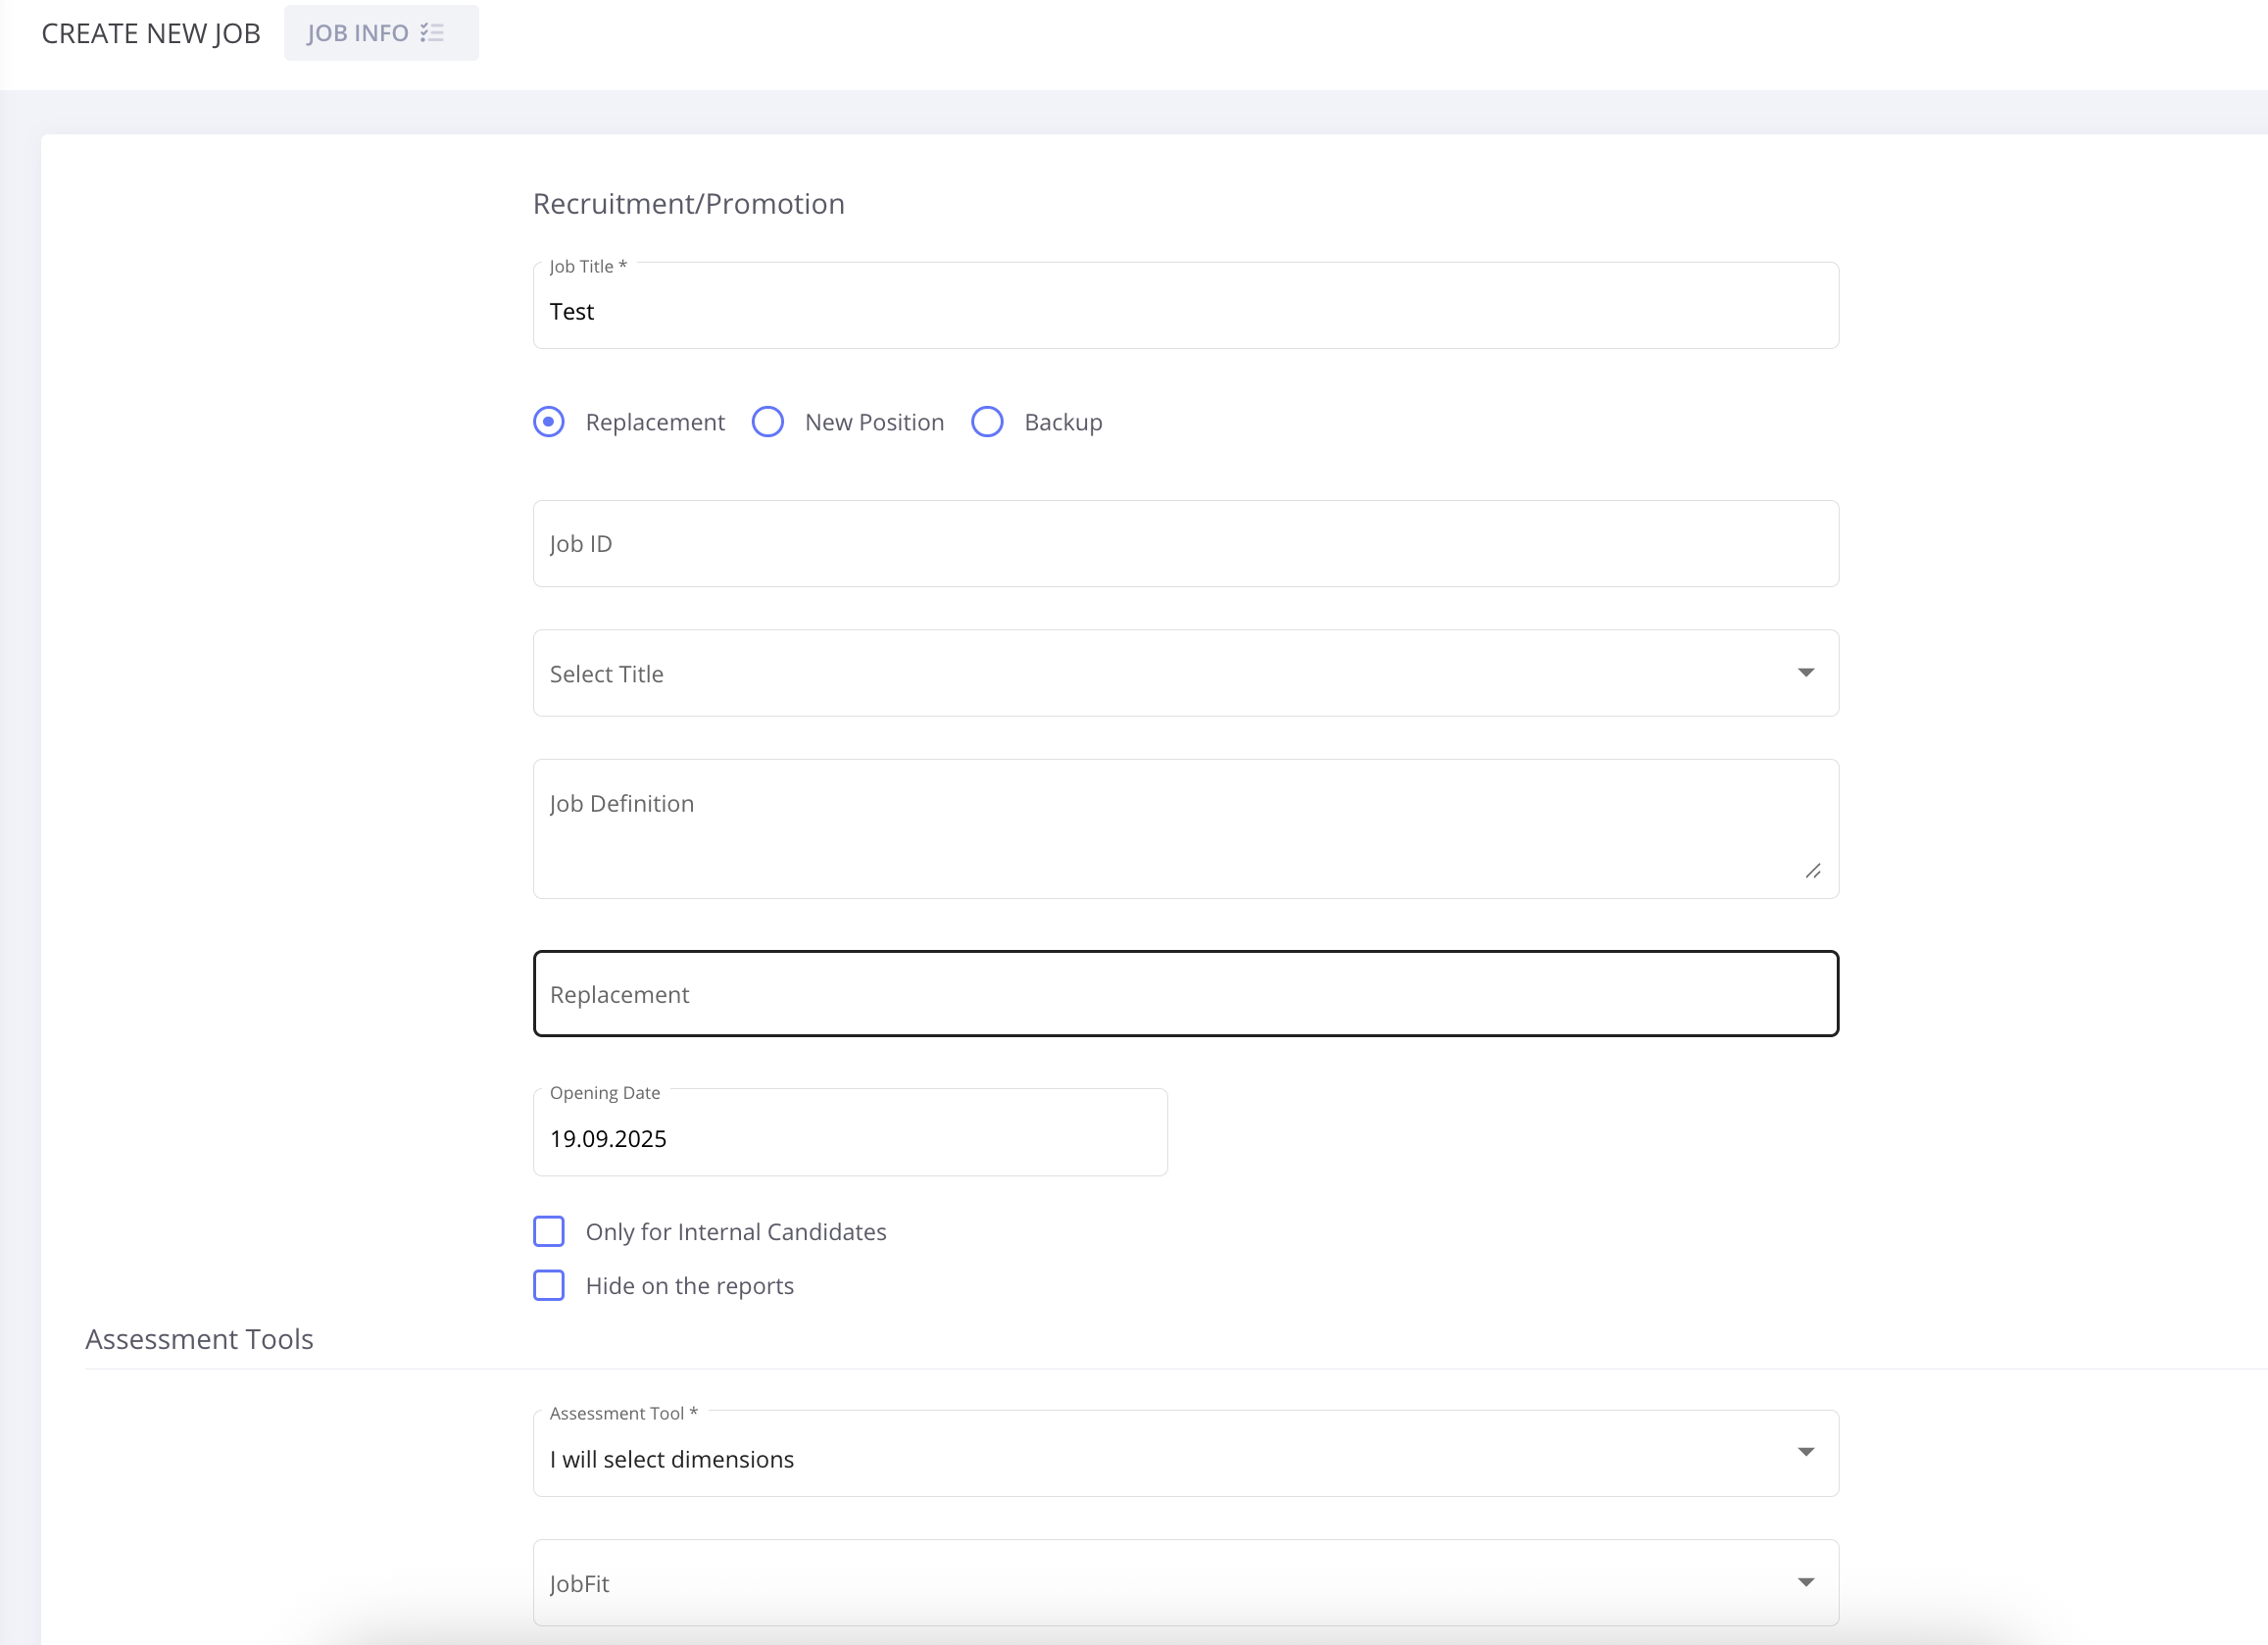
Job Title field should be filled. Replacement/New Position selection should be completed.
If it is an internal position, then “Employee exclusive” option should be selected.
Assessment tool should be selected. If the recruiter wants to select the inventory dimensions then “I will select dimensions” should be selected. The dimensions will be predefined if a specific profile is selected.

Step 2
Hiring Operator, Recruiter, Hiring Manager and Unit fields should be filled under process owners area.
Hiring operator is entitled to use the FlowQ system. Recruiter has the process responsibility. The hiring operator and the recruiter can be the same person.
Hiring manager is the department manager that the new hire will report to. Unit is the department where the new hire will work.

Step 3
Once the assessment tools and process owners areas are completed, Requests and Goals area can be filled optionally.
“Target day” specifies the target day for each person to be hired. For example the target defined as 40 days will reset with the first person hired and starts counting again.
If the first person is hired on the 30th day and the second person on the 65th day after the request is created, time to fill will be measured as 30 days for the first person and 35 days for the second person and the target is accepted as fulfilled. If the first person is hired on the 30th day and the second person on the 80th day, time to fill will be measured as 50 days (Target for the second person will start counting once the first person is hired).

“Target date” is used especially for mass hirings. For instance; if the aim is to hire 5 people in total until a certain date, “target date” can be selected. In this case 3 people can be hired by the end of April and 2 people by the end of May.

The created requests are displayed on the Requests tab within the job. Under the Requests tab, new requests can be created by clicking the “Add New Request” button at the bottom of the page.
Step 4
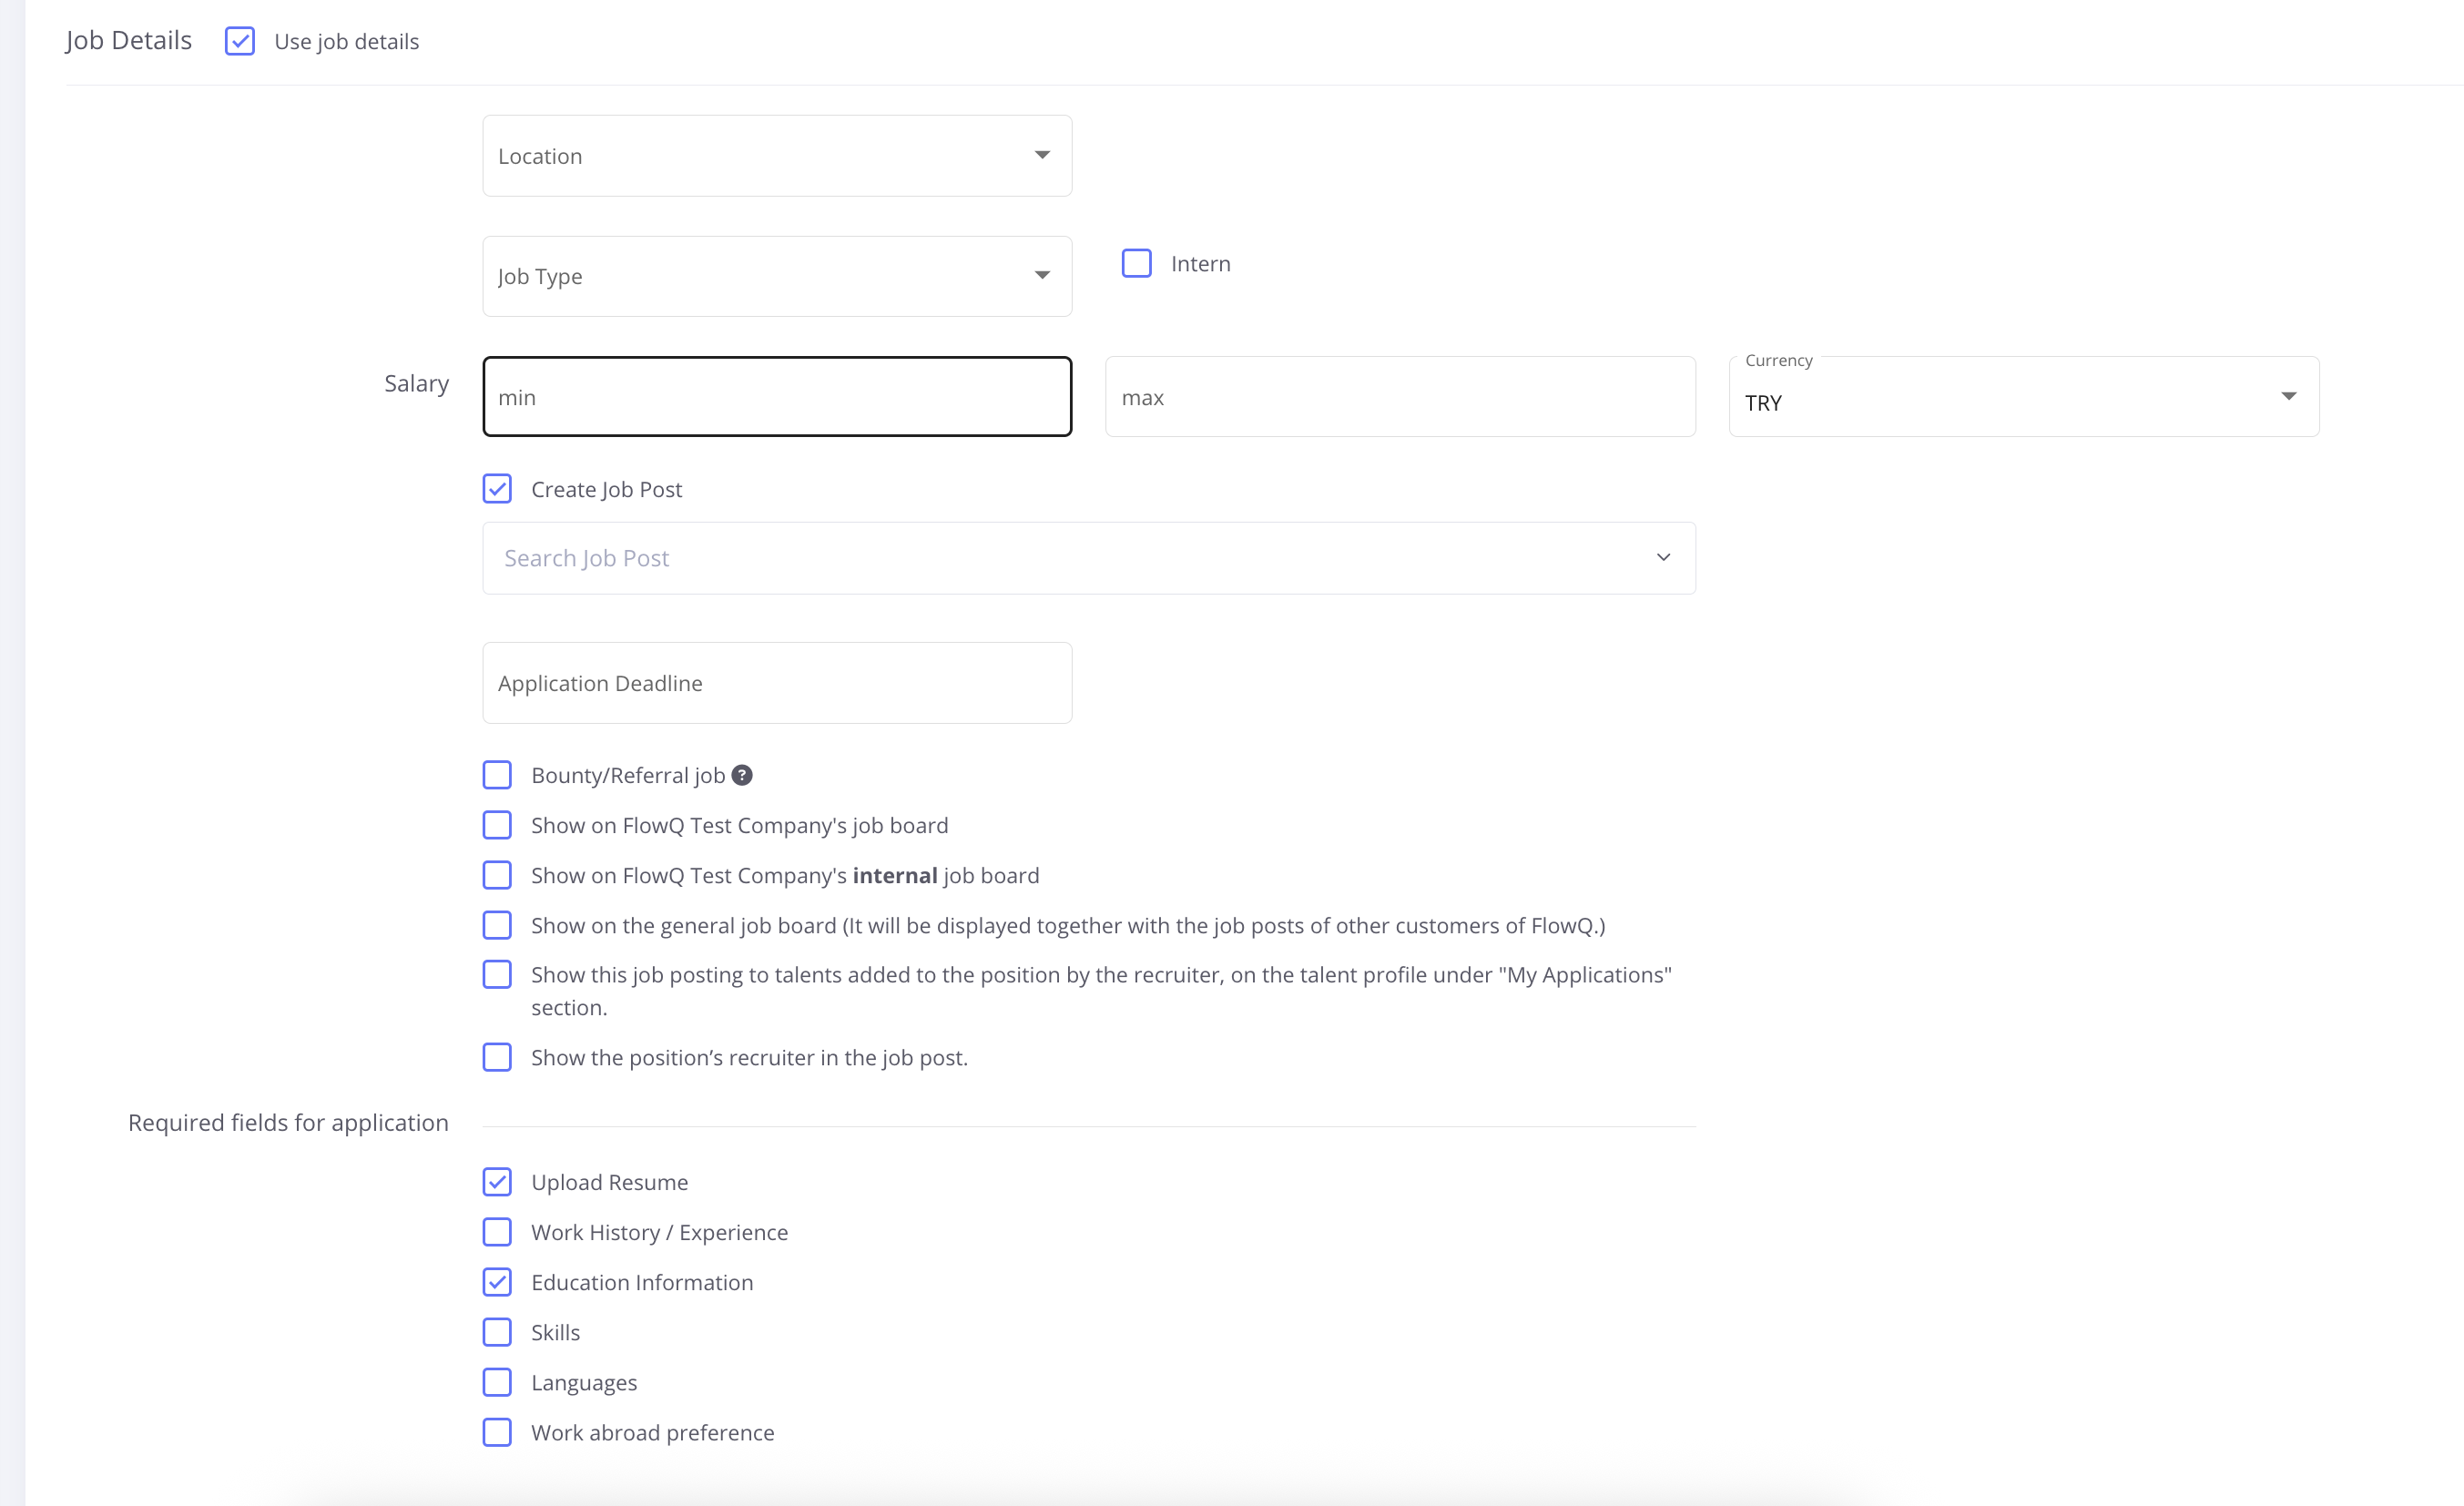
Once “Create Job Post” option is selected, jobpost details should be filled.

Application deadline should be selected.
“Allow referral sharing” option should be selected if the hiring process will also be managed through an employee referral program. If there is an award for the employee referral program, then bonus amount should be filled.
3 options are available while creating a jobpost;
“Show on the company’s job board": The job post will be displayed on the page that the company allows access to all candidates.
"Show on the company’s internal job board”: The job post will be displayed on the page that the company allows access only to internal candidates.
"Show on general job board": The job post will be displayed together with the job posts of other customers of FlowQ.
Step 5

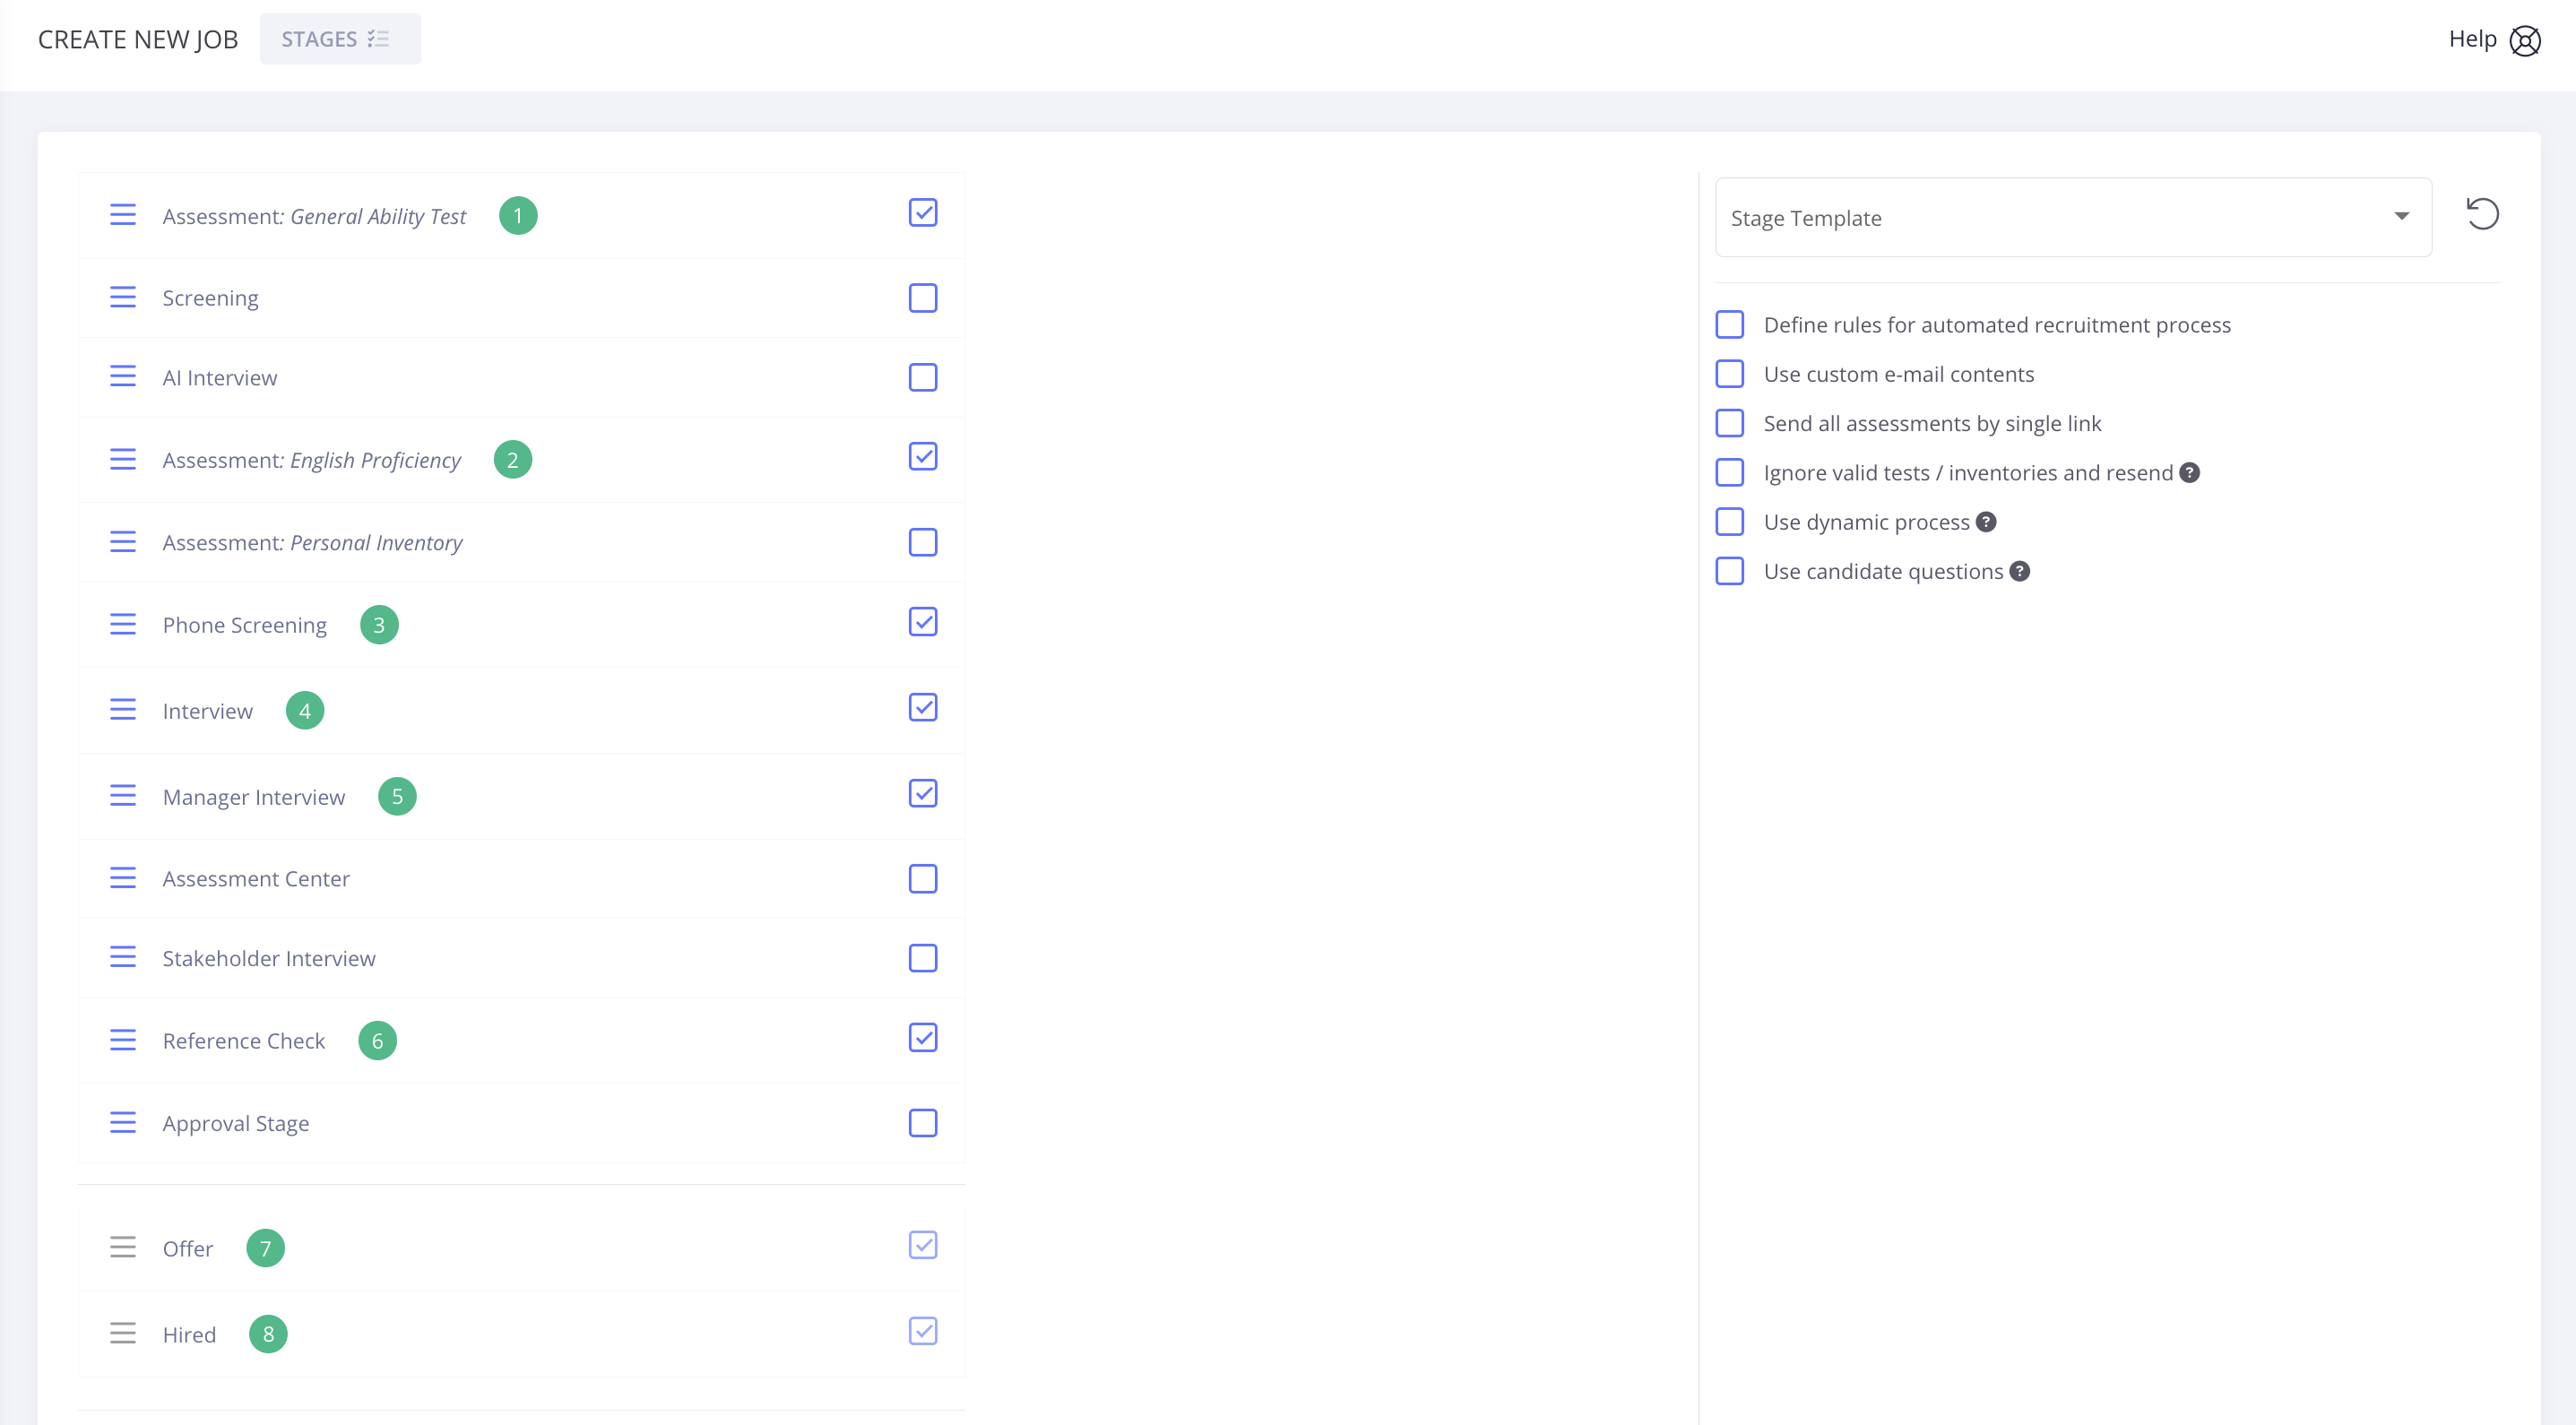
Stages can be selected by clicking the boxes next to them and their order can be changed by drag and drop method. A custom stage or a test can be added as well.
Stage Template enables the recruiter to quickly create frequently used stages.
“Define rules for automated recruitment process” option enables an automatic management of the recruitment process according to defined rules.
By rule definition, candidates meeting the defined rule criteria will be automatically moved to the next stage. If preferred, related assessment tool can be resent to the candidates whose result do not meet the rule criteria.
Recruiter can proceed to rule definition step once the stage selection is completed.
"Use custom email contents"option enables recruiter to select previously created e-mail and introduction template for assessment tools. (New email template can be created under Content Management - Messages section)
Email template selection can be done in the final step (Additional Properties) of creating a position.
“Combine assessments and send them at the same time with one email” option enables the recruiter to send all the assessments with one mail. However if the recruiter wants to define any rule for the recruitment process, then this option cannot be used.
All the selected stages can be combined with this option and all the assessment tools will be managed under one “Assessments” stage.
Step 6
If interactive interview stage is selected, interview questions should be selected or new question should be created. For the completion of interview questions; a specific date or “until end of process” option can be selected from “Last Access Date” area.
Step 7
If General Ability Test is defined as a stage, then test level should be selected. Test levels are differentiated according to the difficulty level. Recruiter may prefer to perform a visual proctoring during the test. If the scores are preferred to be shared with the candidates, then “share results with the talent” option should be selected. Deadline for completion of the test should be selected.
Recruiter may also prefer to perform a visual proctoring during the English test as well. If the English test scores are preferred to be shared with the candidates, then “share results with the talent” option should also be selected. Deadline for completion of the test should be selected.
The arrow on the right side should be clicked in order to view the personality inventory dimensions. Inventory dimensions will be predefined if an assessment tool is selected while creating the position. The number of item in the inventory and approximate inventory duration can also be seen on the right side. Additional dimensions can be selected on top of already defined dimensions. Question mark button should be clicked on for further information regarding the explanation of the dimensions. Deadline for completion of the inventory should be selected.
As a final step, new job will be created by clicking the “Save” button.